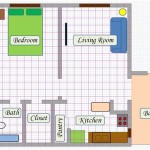
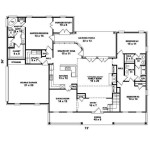
Creating Floor Plans for Free: A Comprehensive Guide
Developing a floor plan is a crucial first step in any construction, renovation, or interior design project. It provides a visual representation of a space, allowing for efficient planning of furniture placement, traffic flow, and overall design aesthetics. While professional architectural software can be quite expensive, numerous free options are available that enable individuals to create detailed and accurate floor plans without incurring significant costs.
This article will explore various methods for creating floor plans for free, delving into the different types of software and tools available, their features, and their suitability for various project scales. The focus will be on providing practical information and actionable steps to empower readers to effectively create floor plans regardless of their budget.
Understanding the Available Tools and Software
The landscape of free floor planning tools is diverse, encompassing online platforms, downloadable software, and mobile applications. Each type offers different functionalities and caters to different levels of user expertise. A preliminary understanding of these options is crucial before embarking on a floor plan creation project.
Online floor plan creators are typically browser-based applications that require no installation. These tools often provide intuitive interfaces with drag-and-drop functionalities, making them accessible to users with limited technical skills. Many offer pre-designed templates and libraries of furniture and fixture symbols, streamlining the design process. Examples include RoomSketcher Free, Floorplanner (limited free version), and Planner 5D (limited free version). While these tools are convenient and easy to use, the free versions often come with limitations such as restricted storage space, watermarks on exported plans, or limited access to features.
Downloadable software provides a more robust and feature-rich experience compared to online tools. While requiring installation, these applications typically offer greater customization options and the ability to work offline. Some open-source CAD (Computer-Aided Design) software, such as FreeCAD, can be used for floor planning although they require a steeper learning curve. Other software may offer a free trial period before requiring a paid subscription. These trials can be a valuable option for short-term projects or for evaluating the software before committing to a purchase.
Mobile applications allow users to create floor plans on smartphones and tablets. These applications often leverage the device's camera and sensors to measure room dimensions and create accurate layouts. Some mobile apps integrate with online platforms, allowing users to seamlessly transfer projects between devices. While mobile apps offer convenience and portability, they may lack the advanced features of desktop software.
Key Considerations for Selecting a Free Floor Planning Tool
Choosing the right free floor planning tool depends on several factors, including the project's complexity, the user's technical skills, and the desired level of detail. Before selecting a tool, it is important to consider the following key points:
Ease of Use: The most effective floor planning tool is one that the user can easily understand and navigate. Consider the user interface, the availability of tutorials and help documentation, and the overall learning curve. For users with limited technical experience, an intuitive drag-and-drop interface is often preferred. More experienced users may appreciate the greater control and customization options offered by CAD software, even if it requires more time to learn.
Features and Functionality: Ensure that the chosen tool offers the necessary features for the project. This includes the ability to draw walls, add doors and windows, insert furniture and fixtures, and specify dimensions. Some tools also offer advanced features such as 3D visualization, material selection, and cost estimation. Evaluate the available symbol libraries and the ability to customize objects to meet specific design requirements.
Output Options: Consider the desired output format for the floor plan. Some tools allow users to export plans as image files (e.g., JPEG, PNG), while others support vector formats (e.g., SVG, DXF). The ability to export plans in a compatible format is crucial for sharing them with contractors, architects, or other stakeholders. Also, consider the resolution and quality of the exported plans, especially if they will be printed or used for professional presentations.
Limitations of Free Versions: Be aware of the limitations of the free version of the chosen tool. This may include restrictions on the number of projects, the size of the floor plan, the available features, or the presence of watermarks. Determine whether these limitations are acceptable for the project or whether a paid upgrade is necessary. Carefully review the terms of service and usage restrictions before committing to using a free tool. Consider the potential for future project iterations and whether limitations will become problematic down the line.
Compatibility and Integration: If the floor plan will be used in conjunction with other software or platforms, ensure that the chosen tool is compatible. This may include compatibility with CAD software, BIM (Building Information Modeling) software, or project management tools. Check whether the tool supports importing or exporting files in standard formats such as DWG or IFC. Integration with other platforms can streamline the design process and improve collaboration.
Step-by-Step Guide to Creating a Floor Plan
The process of creating a floor plan typically involves several key steps, regardless of the chosen tool. A structured approach can ensure accuracy and efficiency. Here is a general step-by-step guide:
1. Gather Measurements: Accurate measurements are essential for creating a realistic and functional floor plan. Use a tape measure or laser distance meter to measure the length and width of each room, as well as the height of the ceilings. Measure the width and height of all doors and windows, and note their positions relative to the walls. Record the location of any fixed elements such as fireplaces, plumbing fixtures, and electrical outlets. Ensure that all measurements are consistent and accurate to avoid errors later in the design process.
2. Sketch a Rough Layout: Before using software, create a rough sketch of the floor plan on paper. This will help visualize the layout and identify potential problems. Indicate the position of walls, doors, windows, and fixed elements. Label each room and note its dimensions. The rough sketch serves as a blueprint for the digital floor plan and facilitates the translation of physical measurements into a digital representation. It is a good practice to walk through the physical space with the sketch in hand, verifying the accuracy of the measurements and layout.
3. Choose a Floor Planning Tool: Based on the considerations outlined earlier, select a floor planning tool that meets the project's requirements. Consider the ease of use, features, output options, and limitations of the free version. Download and install the software or access the online platform.
4. Draw the Walls: Using the chosen tool, start by drawing the outer walls of the floor plan. Ensure that the walls are accurately sized and positioned based on the measurements gathered earlier. Use the tool's drawing tools to create straight lines and specify the wall thickness. Many tools allow users to specify wall types (e.g., interior, exterior) and material properties. Pay close attention to the wall junctions to ensure that they are properly connected and aligned.
5. Add Doors and Windows: Insert doors and windows into the walls, ensuring that they are positioned correctly and sized appropriately. Use the tool's library of door and window symbols or create custom objects if necessary. Specify the door swing direction and the window type (e.g., single-hung, double-hung, sliding). Consider the orientation of doors and windows to maximize natural light and ventilation.
6. Insert Furniture and Fixtures: Add furniture and fixtures to the floor plan to visualize the layout and ensure that there is sufficient space for circulation. Use the tool's library of furniture symbols or create custom objects if necessary. Consider the scale of the furniture and fixtures relative to the room size. Arrange the furniture to create functional and aesthetically pleasing spaces. Consider the traffic flow and ensure that there are clear pathways throughout the floor plan.
7. Add Dimensions and Labels: Add dimensions to the floor plan to indicate the size of each room and the position of elements. Use the tool's dimensioning tools to create accurate and readable dimensions. Label each room and add any other relevant information such as the location of electrical outlets or plumbing fixtures. Clear and accurate dimensions and labels are essential for communicating the design to contractors, architects, or other stakeholders.
8. Review and Revise: Carefully review the floor plan to ensure that it is accurate and meets the project's requirements. Check for any errors or inconsistencies and make any necessary revisions. Consider the overall layout and functionality of the space. Walk through the floor plan virtually to identify potential problems and make adjustments. Seek feedback from others to identify areas for improvement.
9. Export the Floor Plan: Once the floor plan is complete, export it in the desired format. Choose a format that is compatible with other software or platforms. Ensure that the exported plan is of sufficient resolution and quality for its intended use. Consider the file size and optimize it for sharing and storage.
By following these steps, individuals can effectively create detailed and accurate floor plans using free tools, enabling them to visualize their design ideas and communicate them effectively to others. While free tools may have limitations, they provide a valuable resource for planning and designing spaces without incurring significant costs.

Floor Plan Creator Planner 5d

Free Floor Plan Designer

Floor Plan Creator Planner 5d

Floor Plan Creator Planner 5d

Free Floor Plan Creator Edrawmax

Floor Plan Creator And Designer Free Easy App

20 Best Floor Plan Apps To Create Your Plans Foyr

Draw Floor Plans With The Roomsketcher App

Draw Floor Plans With The Roomsketcher App

Floor Plan Creator And Designer Free Easy App


